Soundhole Rosette 2
Step 6 - Assemble the segments
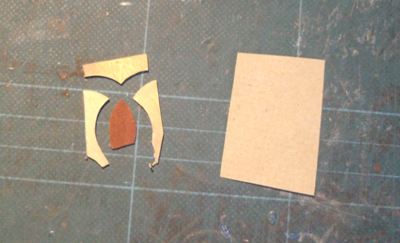
4 oversized pieces ready to assemble into a segment - these will be glued with the papered side down.
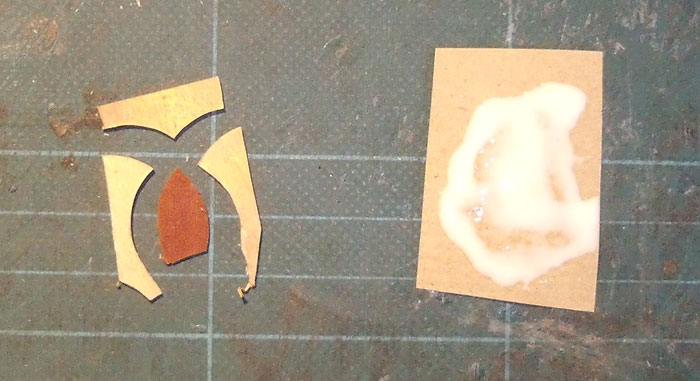
A piece of strong paper with Titebond applied ready to take the 4 pieces which are then pushed tightly together and clamped to make a segment
After careful positioning a bit of finger pressure will
keep the pieces located after which a bit of waxed paper is placed on top
prior to clamping.
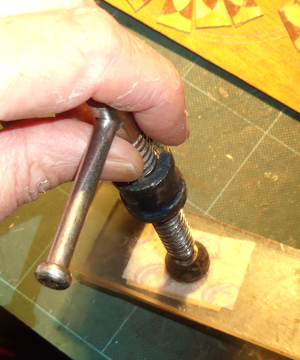
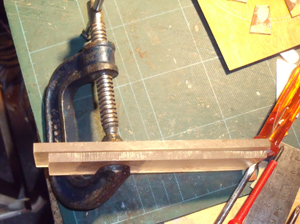
I use a couple of bits of perspex to sandwich the segment being clamped

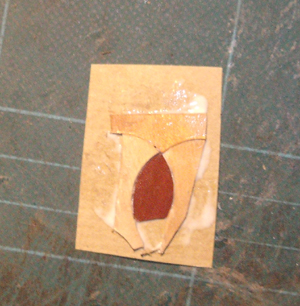
The glued segment after clamping - looks a bit messy at this stage.
Step 7 - Trim the segments

When you have 12 of each type of segment it is time to trim them to size.
I use a clear perspex jig made to an exact 15°
angle with a centre line and a mark giving a consistent size to each segment
- The centre line goes through the intersection of the crown and the bottom
piece - The mark will go to a point to be decided depending on how big you
want each segment to be (the overall diameter of the finished rosette depends
on the width of each segment)
Moving the mark down will make the segment wider - moving it up will make it narrower

You can either use the perspex jig to cut the edges directly or you can draw accurate lines using the template and then use the steel rule to cut the sides off - either way it is a good idea to use a clamp (not illustrated) to hold everything in place when making these cuts

The segment after trimming
Step 8 - Making the backing
We now need a backing sheet to glue the segments to.
The best material for this is very thin plywood which can be bought or
you can make your own as I have here.
Choose a strong veneer. Cut 2 squares that are going to be large enough
to fit the rosette into. Glue and clamp the 2 pieces with the grain at
right angles to each other.
It is possible to use just one sheet of strong veneer for the backing
but the 2 ply substrate gives a lot more strength.
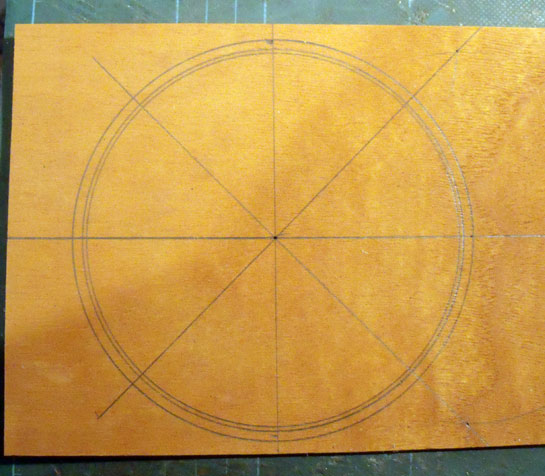
Draw 2 lines crossing at right angles in the centre - halve these again to get eight 45° sections.
You then carefully make one exact hole with the compasses as the centre point.
The outer circle will be the finished diameter of the segments (not the overall diameter of the rosette as we have to add some lines)
The inner 2 circles are to line up the segments with a bit of leeway ( it is virtually impossible to get all the segments to fit together perfectly )
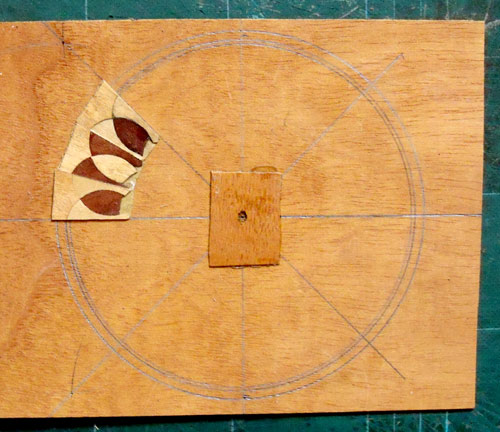
Fitting 3 segments into one of the 45° sections will give a good idea of how large the circles must be.
Note that I have strengthened the centre with another piece of veneer - this is to aid a later process.I have made sure to keep the compass hole in the centre exactly as it was as we need to draw more circles later.
The point of the segment arrowed is what we will use to judge the positioning - as long as those points are either on or between the 2 lines all will be fine.
© Nick Marchant Guitars