Soundhole Rosette 3
Step 9 - Fitting and gluing the segments to the backing
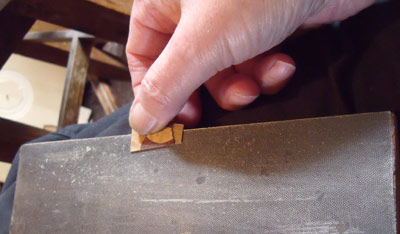
Using a metal sanding sheet fixed with double sided tape to a flat wooden block I will sand the back of
the segments to try and remove a substantial amount of the two layers of paper that are on this side.
With care you can just keep sanding until the pattern becomes visible.
Because this is the side we are gluing to the backing removal of most of
the paper makes for a much stronger joint.
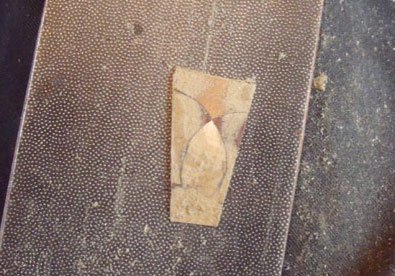
A segment with most of the paper removed from the back - this is now ready to be glued.
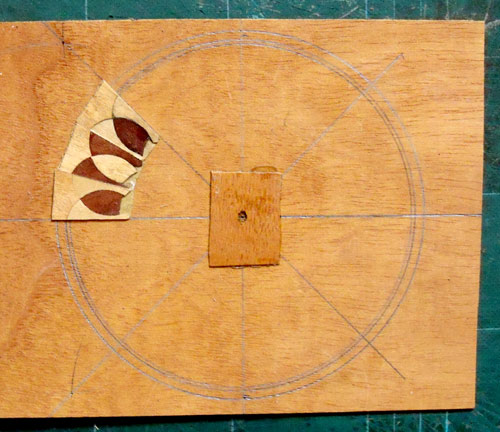
Select three segments making sure they are of alternating
colours and try to fit them into the requisite space.
If they won't fit correctly try changing one or more of them.
If you still can't get a good fit you may have to modify some of them by re-cutting or sanding the edges.
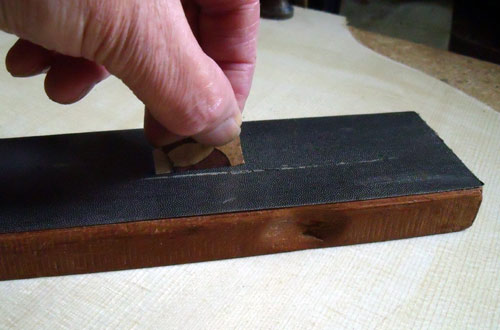
Using the same sanding block mentioned earlier to sand
the edge of one of the segments.
The sanding sheet used is fairly fine so
you can remove a small bit of material from the edge to try to get a good
fit.
Make sure to keep the segment at a right angle to the block to get good fitting edges
Having made sure the 3 segments fit glue the left-hand
one making sure it is tight to the drawn line - a bit of firm finger pressure
is enough to keep it in place.
You then butt the other 2 segments to the first one - squeeze them tight
together with,ideally, a bit of glue coming up between the edges.
Use a slightly damp cloth to remove glue from the surface and particularly
the ends where the next group will have to go.

Put a bit of waxed paper on top of the glued segments and clamp firmly - again the perspex cauls are very handy to make sure the clamps are in the right place
Move on clockwise to the next three segments and fit in
the same way.
You may have to tidy up the right hand edge of the previous group to remove
any glue or overhang - use a scalpel or small file to do this.
When you get to the last group of three you need to make sure that both
ends fit well - this may take a bit more sanding and/or trimmimg
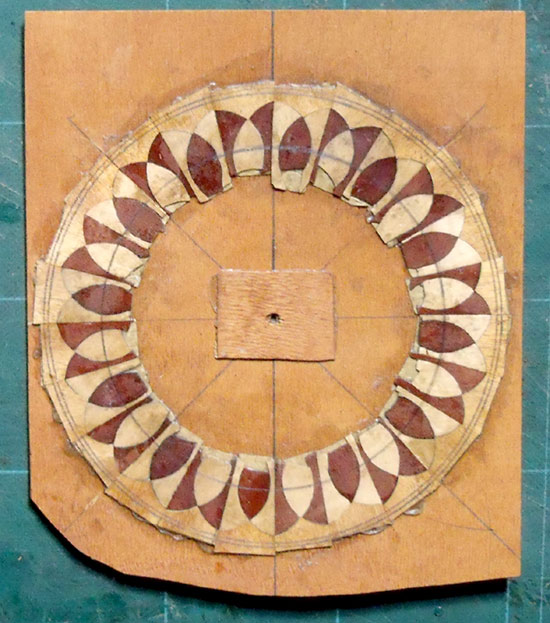
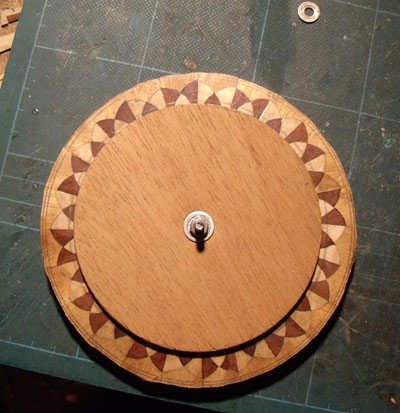
All 24 segments glued into place
Three circles drawn using centre hole and compasses - The outer is the one I will saw to.
The one inside that is the one I will sand to and the inner one denotes the inside of the rosette.
Use your judgement where to place these lines i.e. there is no set place for them.
When not working on the rosette it is best to keep it clamped down flat to minimize any warping that may occur.
Step 10 - Making good the outer edge
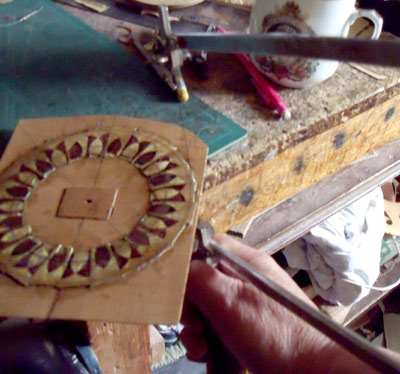
Using a fine fretsaw to trim to the outside line
If you don't have a fretsaw it is possible to use a scalpel to do this
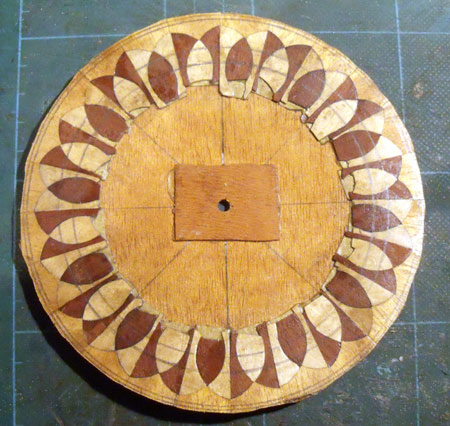
Roughly sawn to the outside line and the central hole enlarged to the size of the bolt I am going to use in the next stage.
Care must be taken to ensure the hole remains exactly in the middle (the
straight lines are useful for checking this).
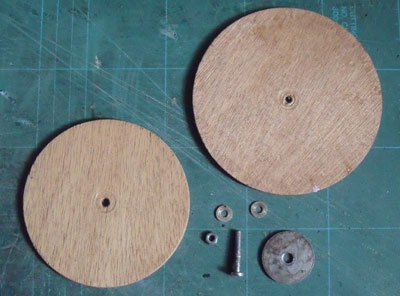
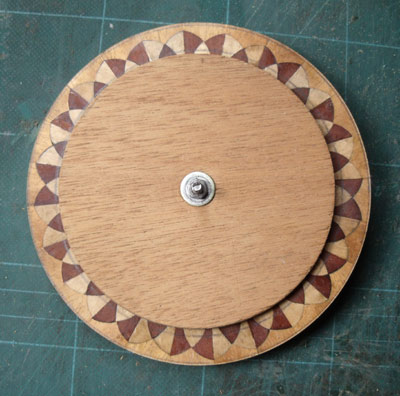
Two plywood discs with central hole the same size as bolt.
Nut, bolt and washers
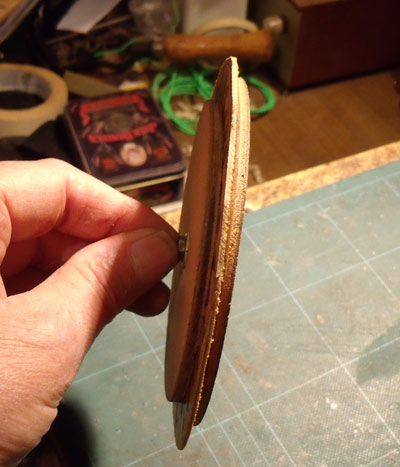
The two discs sandwich the rosette - the bolt is done up tight
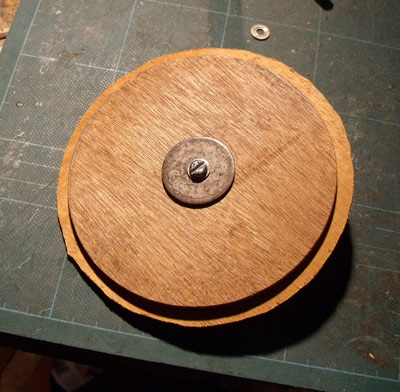
The drawn circle must be visible
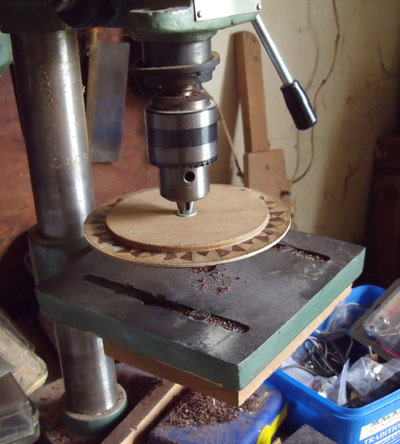
Fit the bolt tightly into the chuck of a pillar drill/drill press.
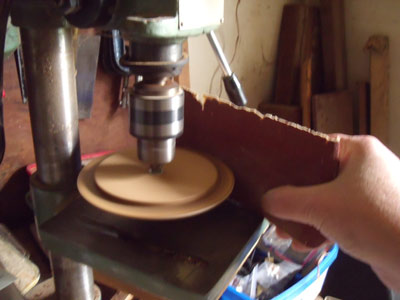
Start the drill and gently apply a sanding block to the side.
I start with silicone carbide 60 grit which will trim material off quite quickly.
Resting the block on the table of the drill helps to keep it stable and at right angles to the spinning rosette
Keep checking the progress of the operation and when getting close to the inner of the 2 lines you can switch to finer grits - 120 followed by 240 for example
If you don't have access to a pillar drill or similar tool this process of creating a smooth circular edge could be achieved by hand using sanding blocks and a keen eye.
© Nick Marchant Guitars